Uploading private content
Andrew
Last Update hace 4 años
Uploading content
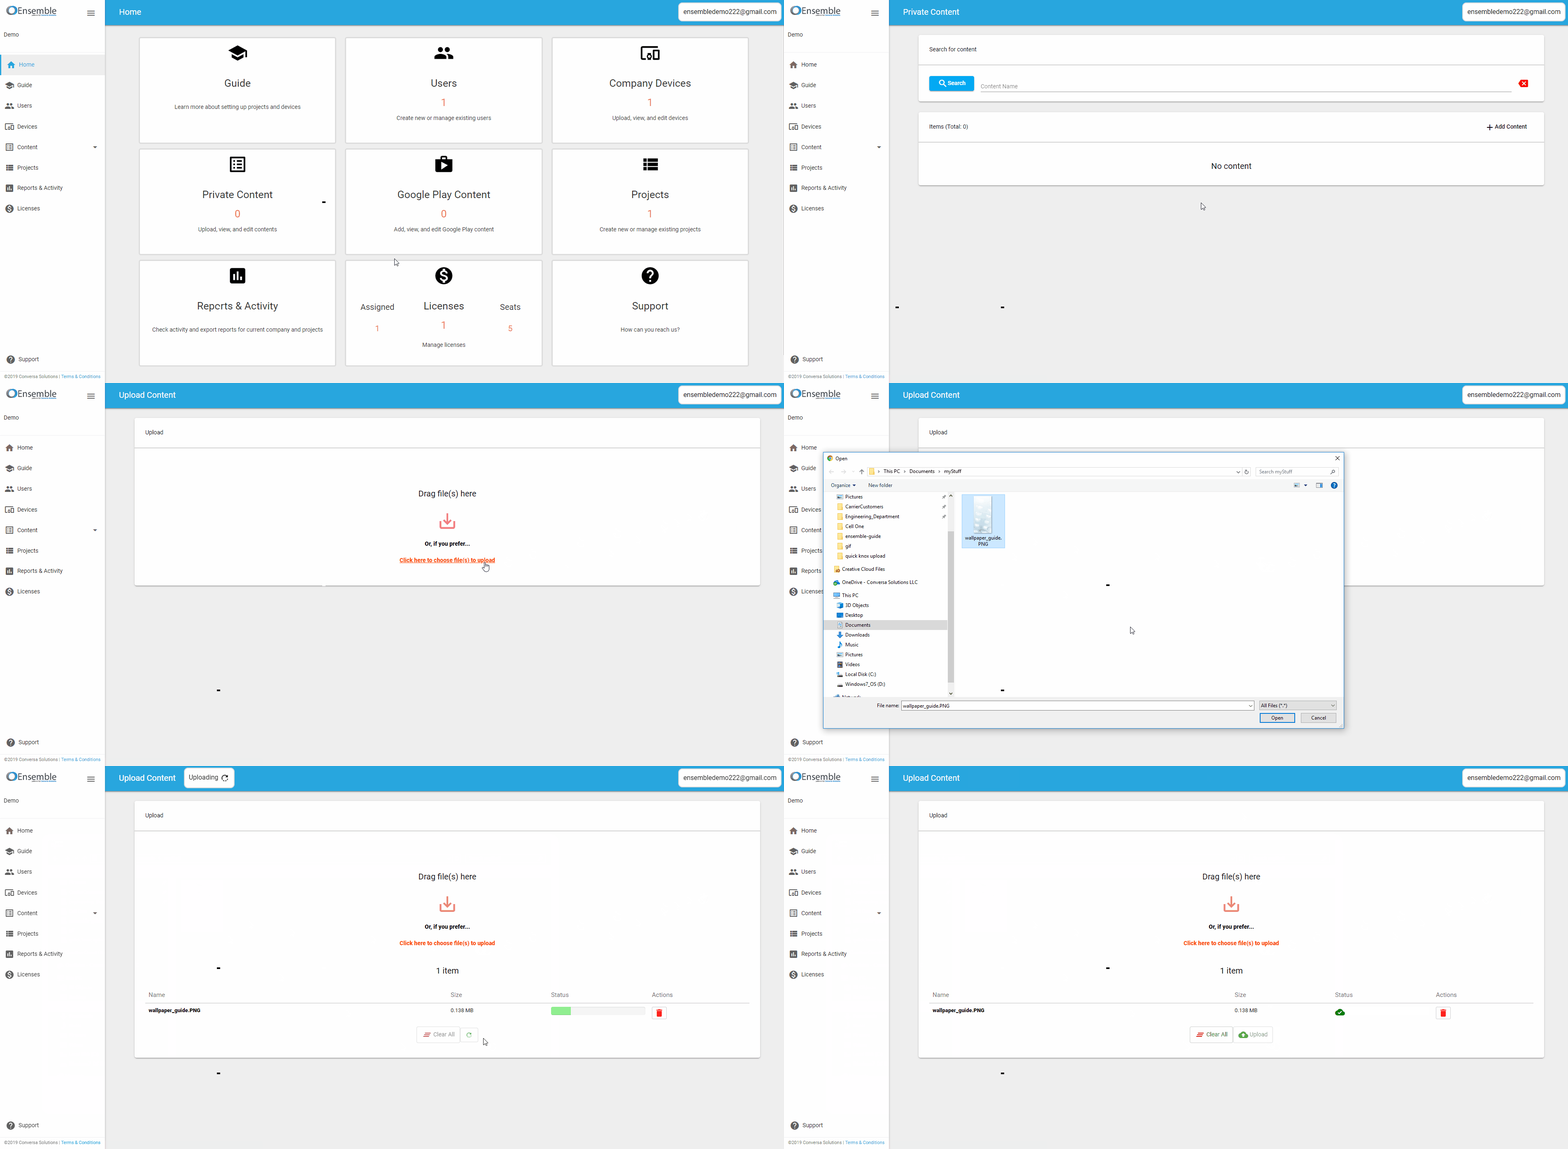
- Navigate to the 'Private Content' page.
- Select 'Upload Content' in the top-right of the Items table.
- Click anywhere in the box to open the file explorer or drag files directly into the box.
- Once the files appear in the table, click "Upload".
- Note: Delete items from the queue individually using the trash button in the row of the item or all at once by hitting the "Clear All" button
- Once uploaded, a green check-mark will appear in the status for each.
- Confirm and the file(s) will appear in the Items table.

Managing content
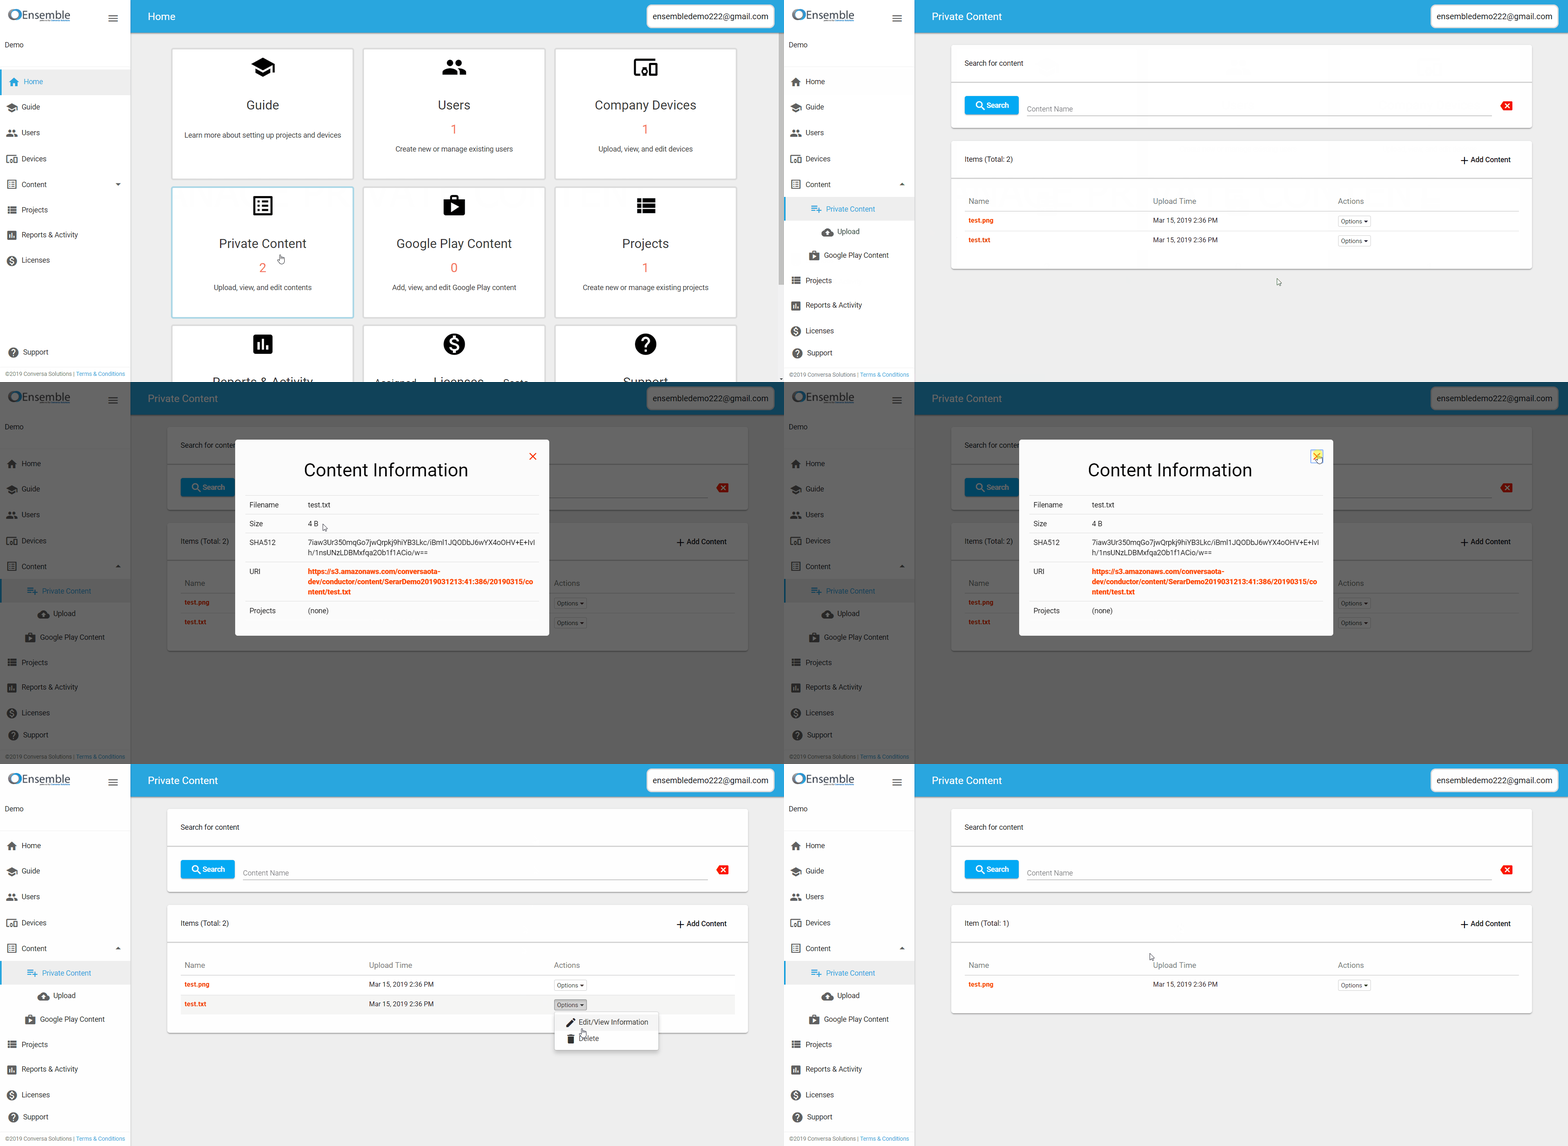
Each item in the Item table will have an options menu in the far-right column. Click the options menu of the content you wish you manage.
- Edit or view information about uploaded content
Opens a dialog where you can edit and view certain aspects about the selected content.
- Delete uploaded content from the content library
Allows you to remove the content from the company. Doing so will also delete it from any project it is tied to.


